Taking some fabric and sewing a sphere seems like a simple task, but it's a geometrically tricky thing to do.
At least, it's a tricky thing to figure out how to do. Now that I've done the mathematical legwork, anyone reading this page can do it easily.
The basic idea is to cut out what I call "orange slices". You cut out six slices and sew them together in a particular way and the result is a sphere.
I've used this method in two costumes so far. I used it as the upper and lower hemispheres of Q*Bert. I also used it for the head of my Super Monkey Ball costume.
If you're curious about the mathematics I've put together a description of how I derived this method.
Quick Simple Steps to Make a Sphere:
1. Choose a diameter for the sphere you want to make. For instance, if you want a sphere which is 20 inches wide then the diameter is 20. It doesn't actually matter if you use inches or centimeters just so long as you are consistent with using whichever units you choose.2. Look up the diameter in the following table. This will give you all the other values you need.
| diameter | D | r | g | h |
|---|---|---|---|---|
| 4 | 5 6/8 | 1 | 1 | 0 2/8 |
| 5 | 7 2/8 | 1 2/8 | 1 | 0 2/8 |
| 6 | 8 5/8 | 1 4/8 | 1 | 0 3/8 |
| 7 | 10 1/8 | 1 6/8 | 1 | 0 3/8 |
| 8 | 11 4/8 | 2 | 1 | 0 4/8 |
| 9 | 12 7/8 | 2 2/8 | 1 | 0 4/8 |
| 10 | 14 3/8 | 2 4/8 | 1 | 0 4/8 |
| 11 | 15 6/8 | 2 6/8 | 1 | 0 5/8 |
| 12 | 17 1/8 | 3 | 1 | 0 5/8 |
| 13 | 18 5/8 | 3 2/8 | 1 | 0 6/8 |
| 14 | 19 8/8 | 3 4/8 | 1 | 0 6/8 |
| 15 | 21 3/8 | 3 6/8 | 1 | 0 7/8 |
| 16 | 22 6/8 | 4 | 1 | 0 7/8 |
| 17 | 24 1/8 | 4 2/8 | 1 | 0 8/8 |
| 18 | 25 4/8 | 4 4/8 | 1 | 1 |
| 19 | 26 7/8 | 4 6/8 | 1 | 1 |
| 20 | 28 3/8 | 5 | 1 | 1 1/8 |
| 21 | 29 6/8 | 5 2/8 | 1 | 1 1/8 |
| 22 | 31 1/8 | 5 4/8 | 1 | 1 2/8 |
| 23 | 32 4/8 | 5 6/8 | 1 | 1 2/8 |
| 24 | 33 7/8 | 6 | 1 | 1 3/8 |
| 25 | 35 1/8 | 6 2/8 | 1 | 1 3/8 |
| 26 | 36 4/8 | 6 4/8 | 1 | 1 3/8 |
| 27 | 37 7/8 | 6 6/8 | 1 | 1 4/8 |
| 28 | 39 2/8 | 7 | 1 | 1 4/8 |
| 29 | 40 5/8 | 7 2/8 | 1 | 1 5/8 |
| 30 | 41 8/8 | 7 4/8 | 1 | 1 5/8 |
| 31 | 43 2/8 | 7 6/8 | 1 | 1 6/8 |
| 32 | 44 5/8 | 8 | 1 | 1 6/8 |
| 33 | 45 8/8 | 8 2/8 | 1 | 1 6/8 |
| 34 | 47 2/8 | 8 4/8 | 1 | 1 7/8 |
| 35 | 48 5/8 | 8 6/8 | 1 | 1 7/8 |
| 36 | 49 7/8 | 9 | 1 | 1 8/8 |
| 37 | 51 2/8 | 9 2/8 | 1 | 2 |
| 38 | 52 4/8 | 9 4/8 | 1 | 2 |
| 39 | 53 7/8 | 9 6/8 | 1 | 2 1/8 |
| 40 | 55 1/8 | 10 | 1 | 2 1/8 |
| 41 | 56 4/8 | 10 2/8 | 1 | 2 2/8 |
| 42 | 57 6/8 | 10 4/8 | 1 | 2 2/8 |
| 43 | 59 | 10 6/8 | 1 | 2 3/8 |
| 44 | 60 2/8 | 11 | 1 | 2 3/8 |
| 45 | 61 5/8 | 11 2/8 | 1 | 2 3/8 |
| 46 | 62 7/8 | 11 4/8 | 1 | 2 4/8 |
| 47 | 64 1/8 | 11 6/8 | 1 | 2 4/8 |
| 48 | 65 3/8 | 12 | 1 | 2 5/8 |
| 49 | 66 5/8 | 12 2/8 | 1 | 2 5/8 |
| 50 | 68 3/8 | 12 4/8 | 1 | 2 6/8 |
| 51 | 69 3/8 | 12 6/8 | 1 | 2 6/8 |
| 52 | 70 6/8 | 13 | 1 1/8 | 2 7/8 |
| 53 | 72 1/8 | 13 2/8 | 1 1/8 | 2 7/8 |
| 54 | 73 3/8 | 13 4/8 | 1 1/8 | 2 7/8 |
| 55 | 74 5/8 | 13 6/8 | 1 1/8 | 2 8/8 |
| 56 | 76 1/8 | 14 | 1 2/8 | 3 1/8 |
| 57 | 77 3/8 | 14 2/8 | 1 2/8 | 3 1/8 |
| 58 | 78 5/8 | 14 4/8 | 1 2/8 | 3 1/8 |
| 59 | 79 6/8 | 14 6/8 | 1 2/8 | 3 2/8 |
| 60 | 81 1/8 | 15 | 1 2/8 | 3 2/8 |
| 61 | 82 3/8 | 15 2/8 | 1 2/8 | 3 3/8 |
| 62 | 83 7/8 | 15 4/8 | 1 3/8 | 3 4/8 |
| 63 | 84 8/8 | 15 6/8 | 1 3/8 | 3 4/8 |
| 64 | 86 2/8 | 16 | 1 3/8 | 3 4/8 |
| 65 | 87 4/8 | 16 2/8 | 1 3/8 | 3 5/8 |
| 66 | 88 7/8 | 16 4/8 | 1 3/8 | 3 5/8 |
| 67 | 90 1/8 | 16 6/8 | 1 3/8 | 3 6/8 |
| 68 | 91 3/8 | 17 | 1 3/8 | 3 6/8 |
| 69 | 92 6/8 | 17 2/8 | 1 3/8 | 3 7/8 |
| 70 | 93 7/8 | 17 4/8 | 1 3/8 | 3 7/8 |
| 90 | 117 7/8 | 22 4/8 | 1 4/8 | 5 |
| 100 | 127 6/8 | 25 | 1 2/8 | 5 5/8 |

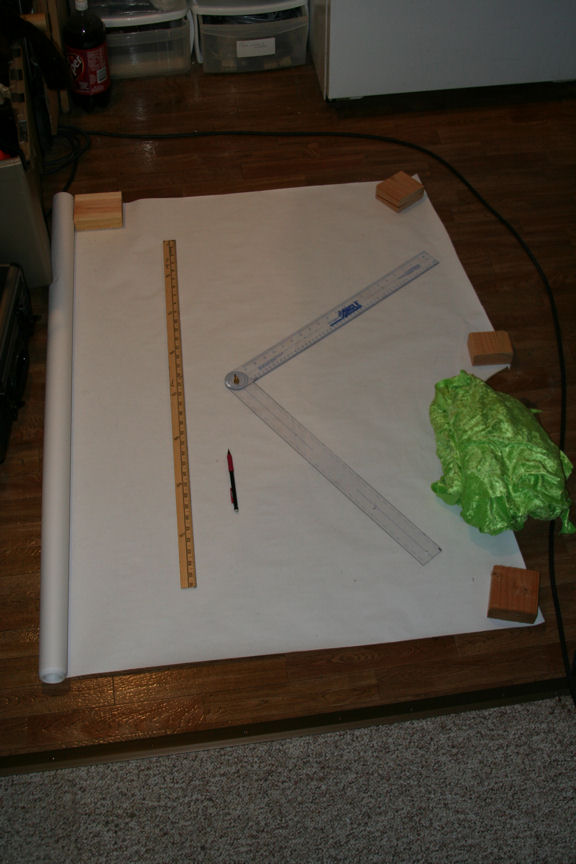
4. Draw a line of length D. Then, in the middle of the line draw a vertical line of length 2*r. The result should be a big plus with one line (the D line) much longer than the other.

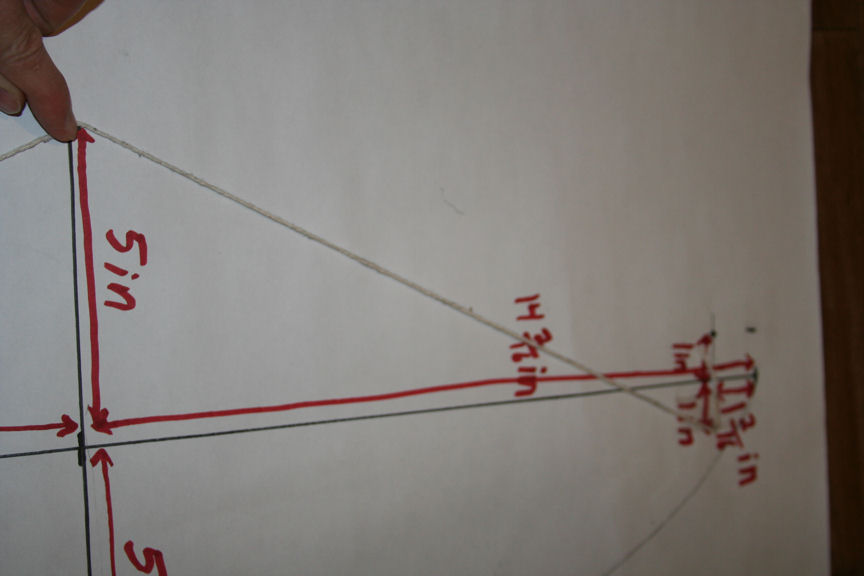
5. FOCAL POINTS: From one end of the long line go vertical by length g and horizontal toward the center by length h. Draw a dot there. Do the same thing on both sides and both ends of the the long line. These 4 points are the focal points.
6. Get a piece of string and tape one end to one focal point. Run the string to the near edge and then run it to the other focal point and tape it there.


7. Take a pencil and draw the curve as shown in the picture. Make sure to keep the string taught at all times. If you do this right the curve should run from one end of the long line to the end of the short line and then to the other end of the long line.
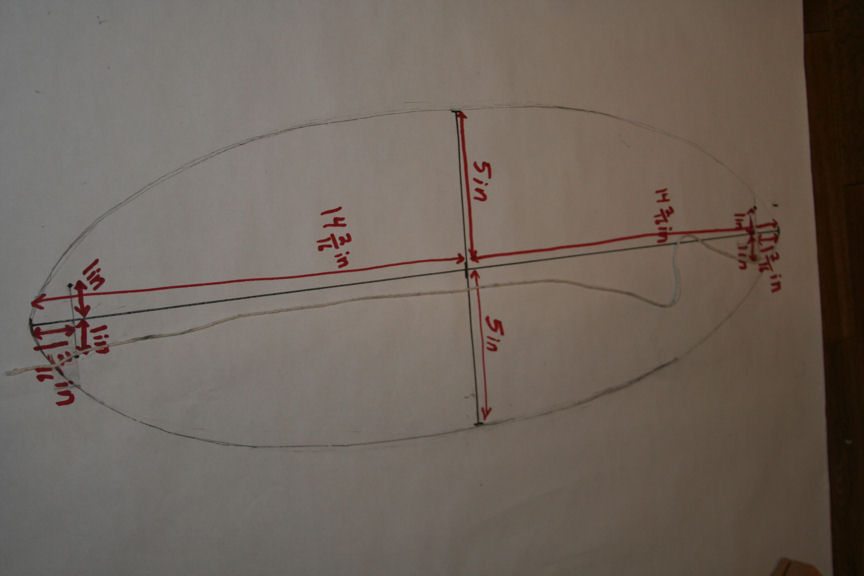
8. Now draw the curve on the other side. You'll need to move the string over to the focal points on the other side before doing this.
9. The end result is what I call an orange slice. It's like an ellipse except that it's pointed on both ends.
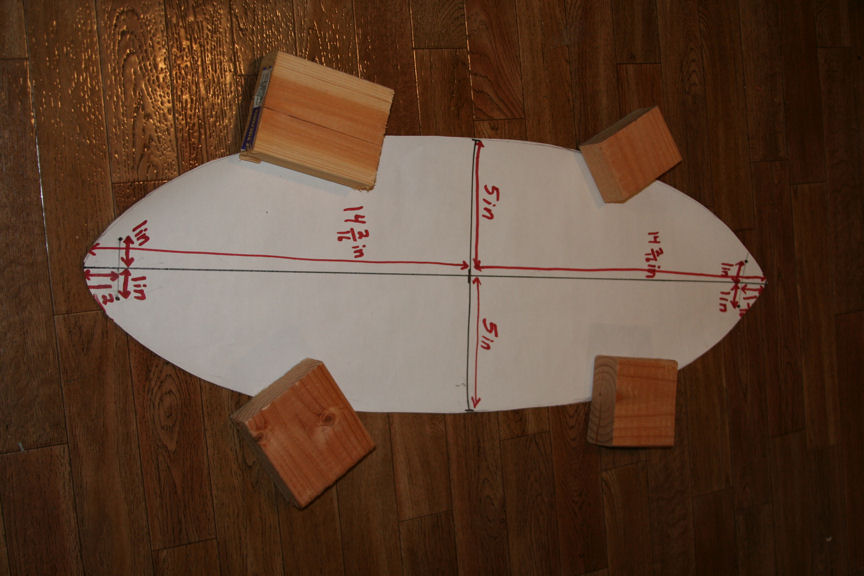


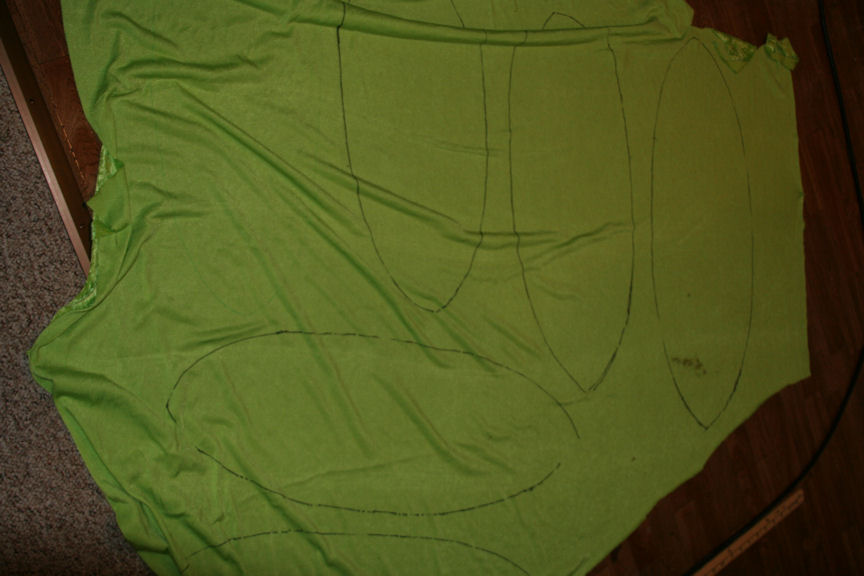

10. Cut out the orange slice. Use that shape as a template. Trace this shape onto your fabric six times and then cut out all six orange slices. NOTE: When you cut out the slices make sure to leave some space around the edge of the line (a half inch is sufficient). The actual stitch will run along the line you traced.
11. Sewing the slices together is a little tricky to understand, but it doesn't take too long to get the hang of it. Just be very careful when sewing the slices together the first time. It's too easy to sew the wrong sides together and end up with something that's definitely not a sphere.


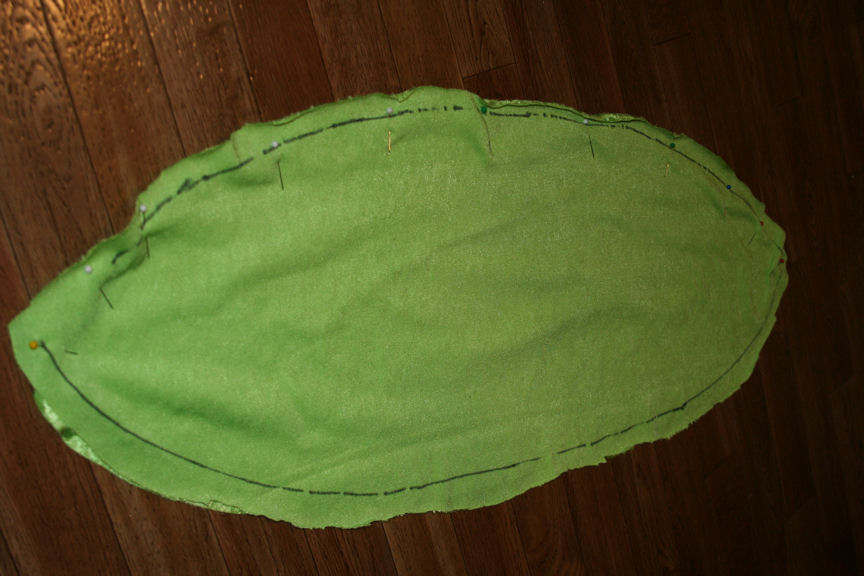

12. Take two slices and lay them together with the "bad" side out. Pin them together and sew along one line. Don't sew both lines! Repeat this process until you have three pairs of slices.


13. Take two pairs and flip them inside out. Place them on top of each other and pin them together along one line. Then, sew that line.

14. Take the resulting four-slice and the remaining two-slice and place them together in the same way.

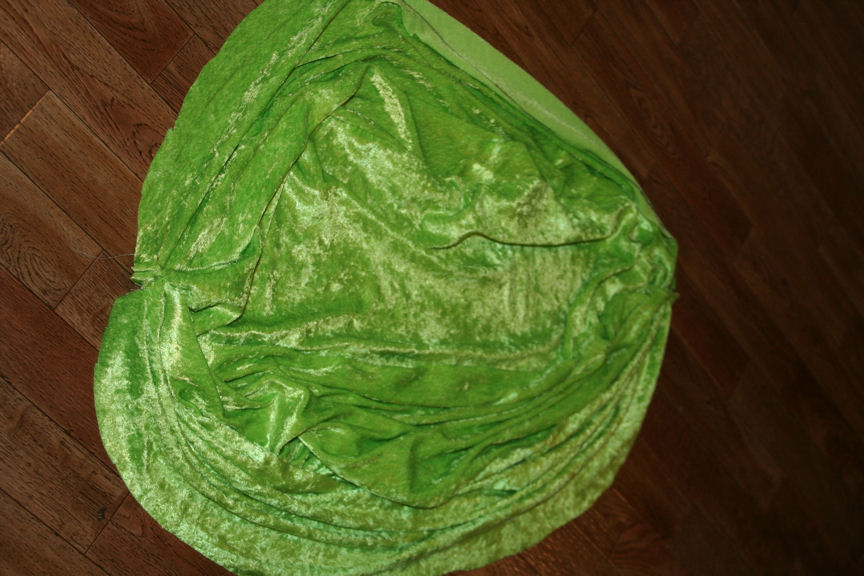
15. You should now have all six slices together. You just need to sew the final edges together to make the sphere. Make sure to leave some space unsewn on this seam so that you can flip the sphere inside out.


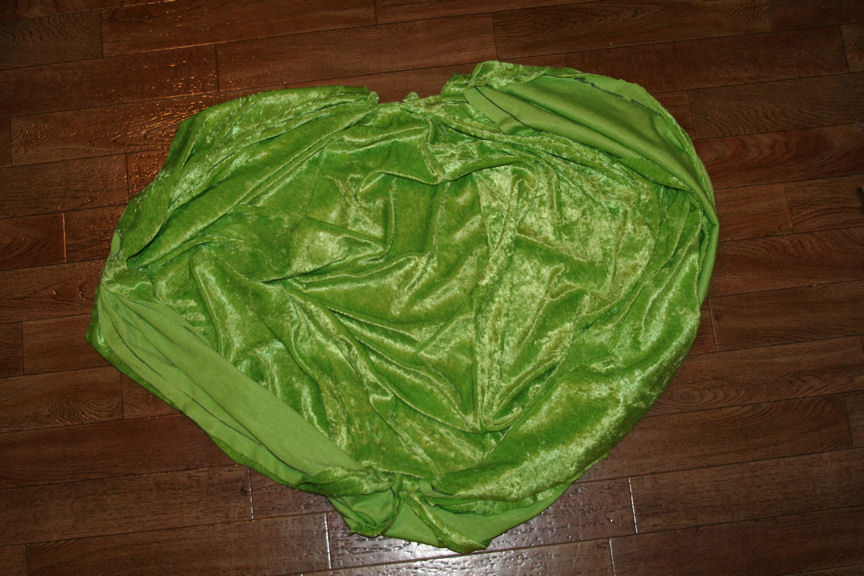
16. When that's all done, flip it inside out to see that you've really made a sphere. If you're happy with it then you can stuff it if your goal is to have a stuffed ball. Once you're done stuffing then sew up the last seam end until it's a complete sphere.
Variations
elongated sphere (an ellipsoid)
To make an elongated sphere (an ellipsoid), follow the instructions for making the sphere, but don't sew the slices all together. Sew 3 slices together to make a hemisphere. Then repeat for the other 3 slices. The result will be two hemispheres. You can then cut a strip of cloth for the enter. Sew the hemispheres to the strip of cloth and the result is an ellipsoid. This is the approach I used to make my Q*Bert costume.Strictly speaking the result is more like a hot dog than an ellipse, but if you keep the center section short, you won't be able to tell the difference. At some point I may run the calculations to determine exactly how to get a perfect ellilpsoid, but this should do for now.
Version 13.1 last modified by Geoff Fortytwo on 20/12/2011 at 20:23
Document data
Attachments:
No attachments for this document